northernelectric.ca main index < kites<
I recently upgraded my iPod from a 2nd Generation iPod Nano, to a 4th Generation iPod Touch, which has both a front and rear camera. Not really great cameras, but good enough for low-quality snapshots. The standard image size is 960 x 720 pixels, in either portrait or landscape orientation. After browsing the App Store for a while, it occured to me that there must be an app for time-lapse photography. There are indeed several of them, some free, as it turns out. For now, at least, I've settled on "TimeLapse - Free" by xyster.net.
Here it is in the app store: http://itunes.apple.com/us/app/timelapse-free/id312286984?mt=8 . It also works on the iPad and iPhone.
It will allow you to set the interval between shots, and save either as video (with playback frame rate of your choice) or as a a series of still images. It also has a setting such that it will blank the screen, to save battery life. It's really more like demo ware or cripple ware because there is a limit of 59 frames per sequence unless you buy the full-featured version for US$1.99. I just might do that.
In any case, it soon occured to me that I could then fasten my iPod to a kite or kite line, and use the time-lapse app to delay taking photos until it's up, take a series of shots, and then stop and wait for me to take it down. I hadn't tried that with my regular point-and-shoot compact digital camera because I had no (inexpensive) way to operate the shutter release on a timer or by remote control. That's something to consider when shopping for a camera: Does it have some kind of built-in shutter intervalometer control?
iPod Touch 4G specs:
Height: 4.4 inches (111.0 mm)
Width: 2.32 inches (58.9 mm)
Depth: 0.28 inch (7.2 mm)
Weight: 3.56 ounces (101 grams)
Not a lot of mass, even as compact cameras go. Rather than go through all the hassle of building a Picavet suspension for the initial attempts, I decided on a very simple setup, just to get an idea of how the photos might look - sharpness, view angle and so on.
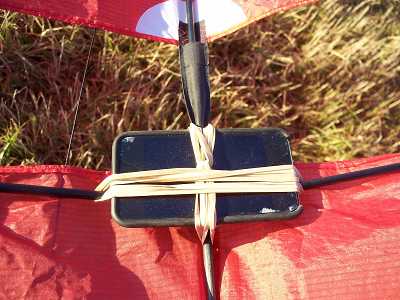
Take my Pearson Roller, and fasten the iPod on the back side of the lower spars and spine with nine rubber bands. (six on the spine, three around the spars)
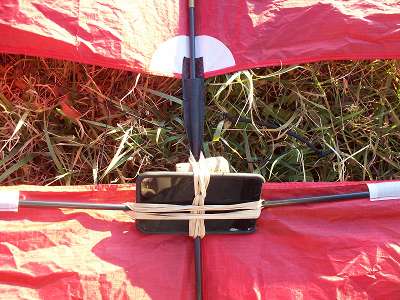 This is the view from the rear. For this version, I jammed a cork between the "top" of the iPod and the spine. This was intended to tilt it back a bit so as to point more to the horizon rather than down the flying line. The iPod also has a hard black plastic case with rubbery edges and a clear plastic film to protect the display glass from scratches.
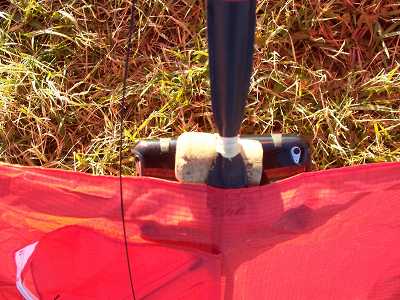 This is the view from the front face of the kite. See the little silver teardrop-shaped spot on the upper right of the iPod? The black dot on it is the main (back) camera lens, such as it is. Because the lens is off-centre, it allows me to mount the iPod right in the middle of the kite frame without the frame blocking the lens.
Next I launched it from my hand, on 50 pound line. Right away, it started to do these rather violent figure-eight loops, and continued to do them even after I got about 75 feet of line out, so I brought it down. I removed the iPod and cork, and tried the kite without them. Of course, it flew nice and straight and high, until I got it up on about 150 feet of line, at which point the line broke about 100 feet down from the kite. The wind was only about 15-20 km/h, so there must ave been a nick in the line or something. I chased it down and retrieved it. This is why I do experiments only where there is a lot (almost a kilometer) of downwind clear space. Here's the Google Maps location. So, I switched to a reel of 100 pound line.
I left the cork out because when the kite hit the ground earlier the iPod almost fell out. Also, I thought that it might conceivably have something to do with the unstable flight behaviour.
 This felt a bit more secure, so I was ready to launch again.
Again, it did the tight figure-eight loops, even when I added a bit of a tail (the storage bag). I took the tail off, and set it for 20 frames, 10 seconds apart, with a 10 second delay before the first one.
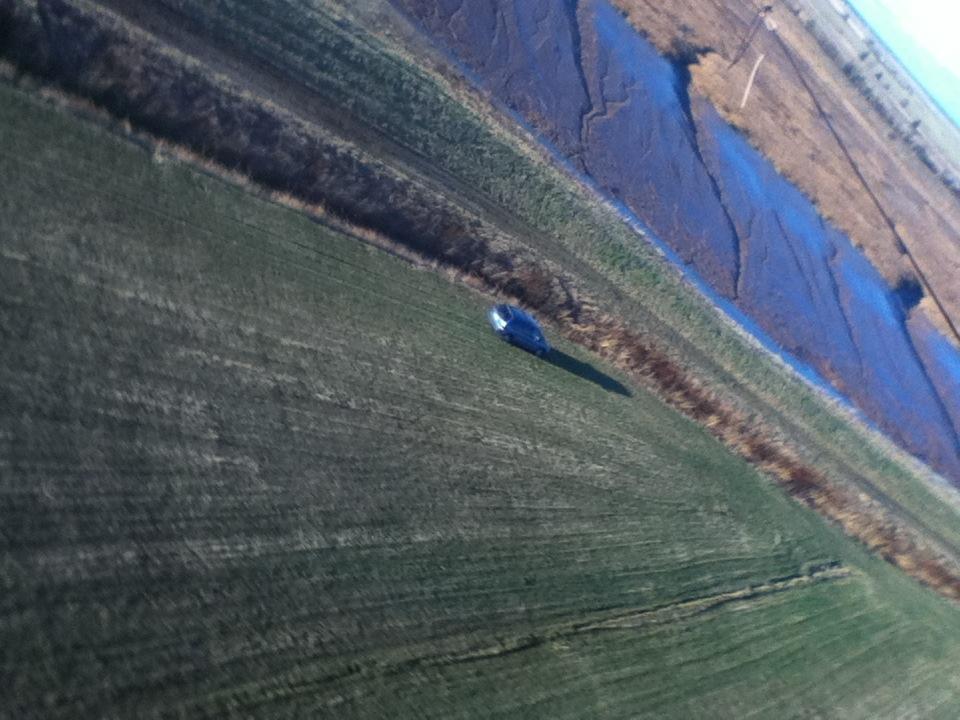
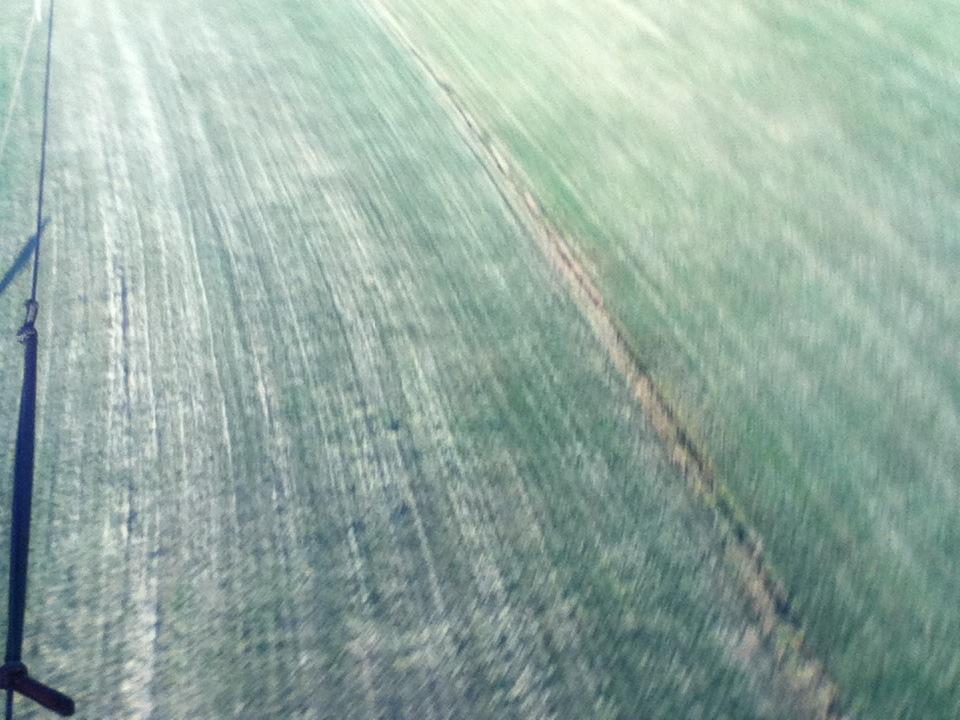
Here are the results, with about 100 meters of flying line out. (clicking on them will open a doble-sized version):
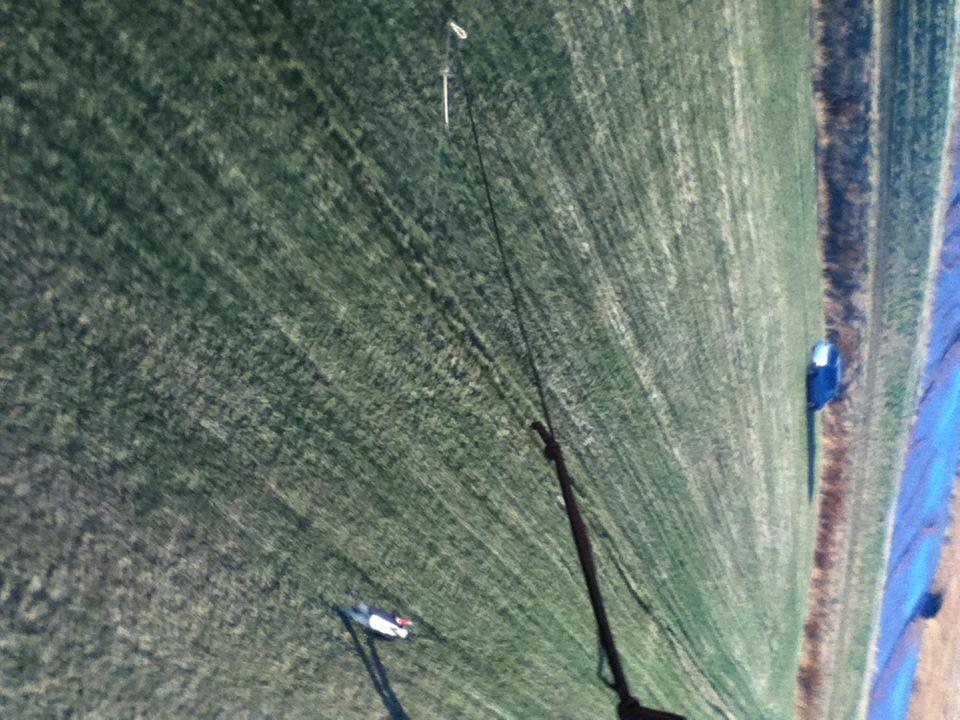
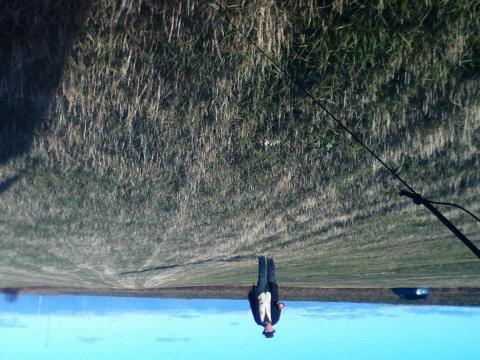
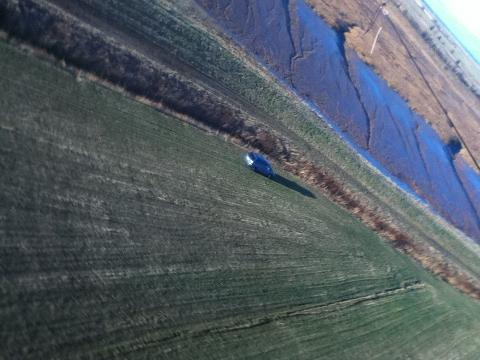 The anchor stake was half way between the van and the lower right corner of the photo, not far from that narrow drainage ditch.
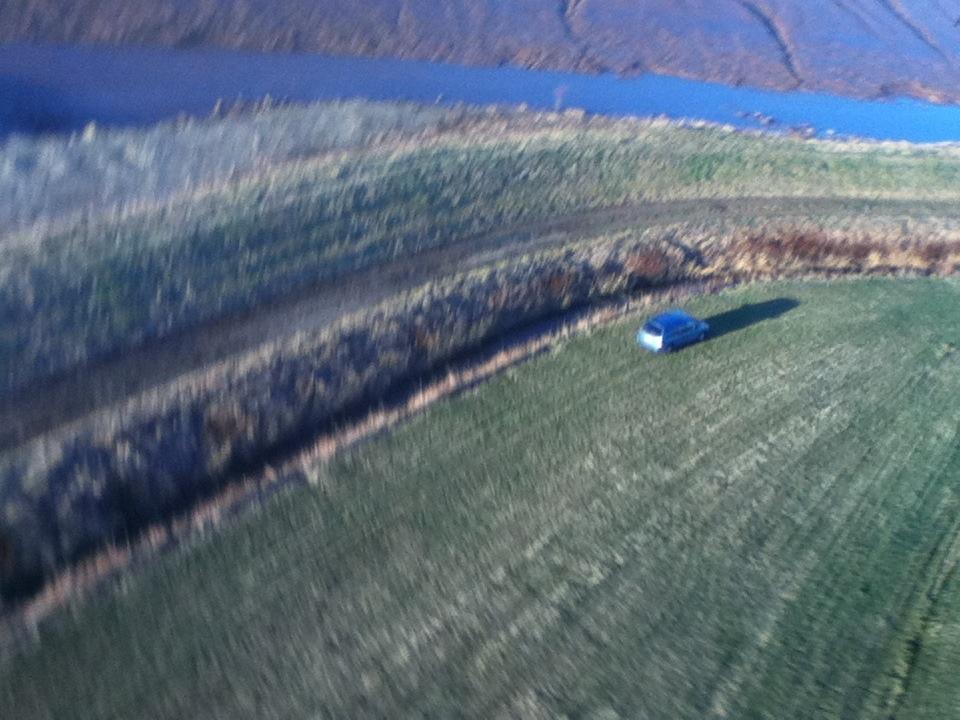
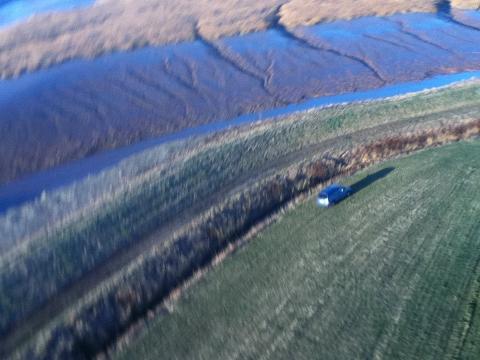 What we're looking at here is my van in a hay field. From right to left, there's a fairly large ditch, a narrow roadway, a dike, and a bend in the river (Morrice Creek?) at low tide. That river has a lot of twists and turns, nearly surrounding the field, and so I think it could make an interesting subject for KAP, if I get the camera up high enough. Maybe a few hundred meters will do it.

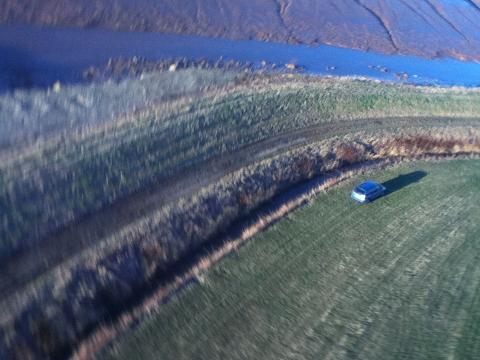
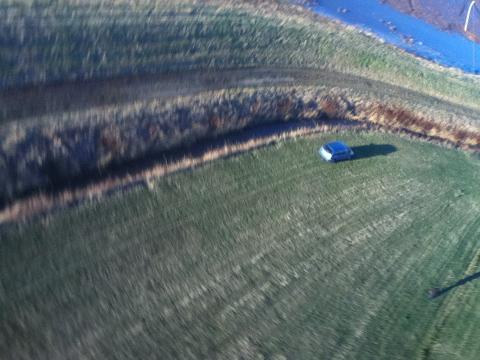
 I rather like the almost iridescent effect of the wet mud.
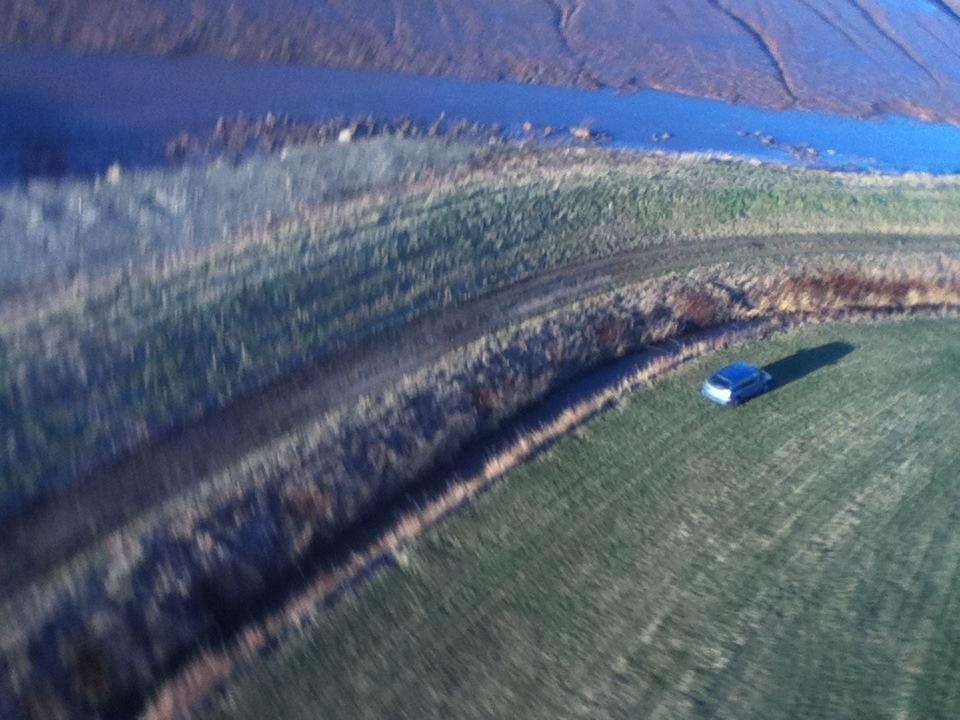
 Are you dizzy yet?
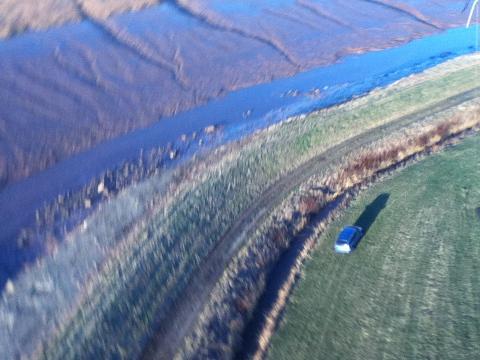
 That black line along the left is the section of bungee cord in the lower bridle leg.
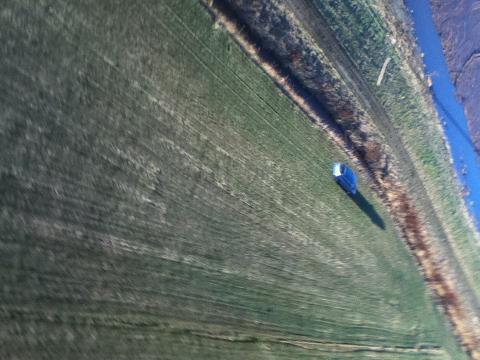
 Yes, it did tip over this much each time, on both sides.
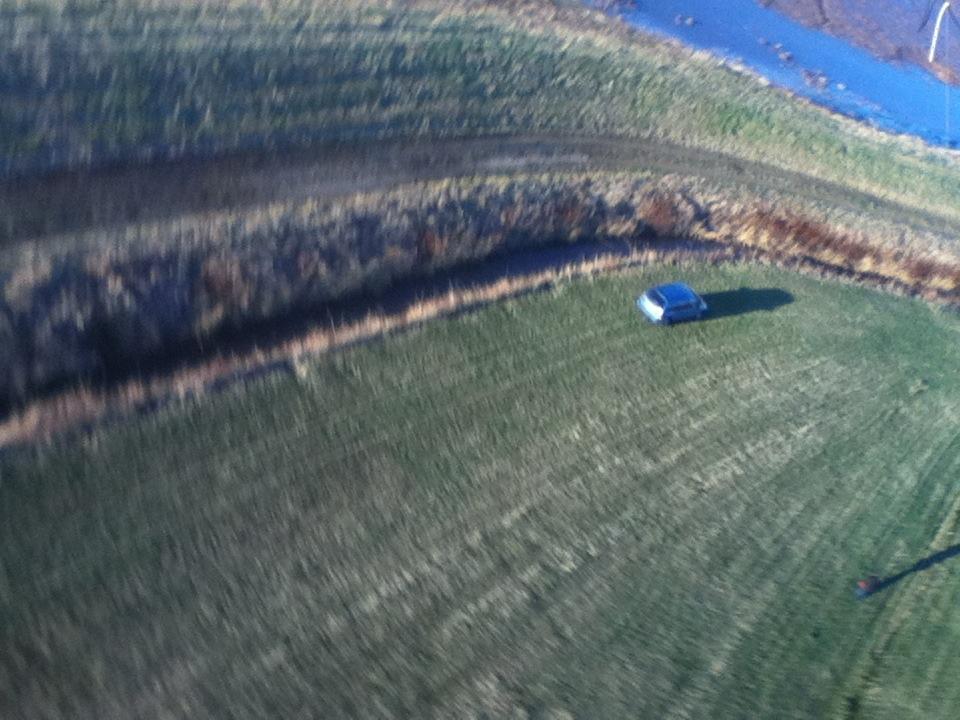
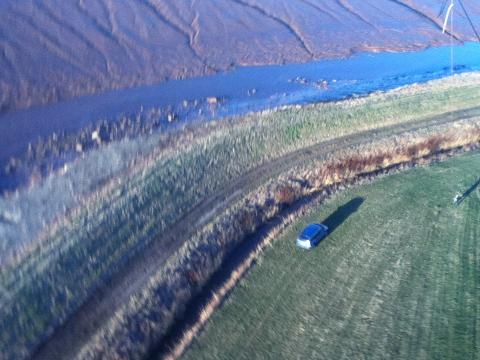
I knew I wasn't going to get much, so I started to walk it down...

 ... and put it out of it's misery.
I had to rotate two of the photos from "portrait" to "landscape" mode. This is because, by default, the camera adjusts itself depending on which way it thinks is "up". The oscillations of the kite were four or five times faster than the interval between photos, which too fast for the tilt detection to react to.
- It really surprised me that adding such a little bit of mass (slightly more than 101 grams), balanced in the middle, was able to affect the flight so dramatically. It didn't drift sideways much, and flew at a fairly high angle, and was (other than the tight figure-eight turns) more or less stable, as far as staying in the same place goes.
- The oscillations show up as blurring on the sides away from the axis of rotation around the flying line.
- By mounting the iPod directly on the centre of the frame of a Peason Roller (and most other framed kites) I'll always get the bridle and/or flying line in the photo.
- The rubber bands across the touch screen make it difficult to operate the iPod and work the settings menus.
- I really must fabricate a Picavet suspension to get it off the kite frame, to be able to use other kites such as soft kites. The tricky part will be fabricating (or buying) a mount for the iPod that permits full use of the touch screen, and protects the iPod from hard bumps or being dragged during rough landings.
- Even when the kite looping is fixed, the photos won't be of very high quality due to the limitation of the camera in the iPod. It's just a fun thing to do anyway. (Even so, I hear that the new iPhone will have an 8 megapixel camera in it.)
Stay tuned!
northernelectric.ca main index < kites<
 This is the view from the rear. For this version, I jammed a cork between the "top" of the iPod and the spine. This was intended to tilt it back a bit so as to point more to the horizon rather than down the flying line. The iPod also has a hard black plastic case with rubbery edges and a clear plastic film to protect the display glass from scratches.