 March 14, 2009.
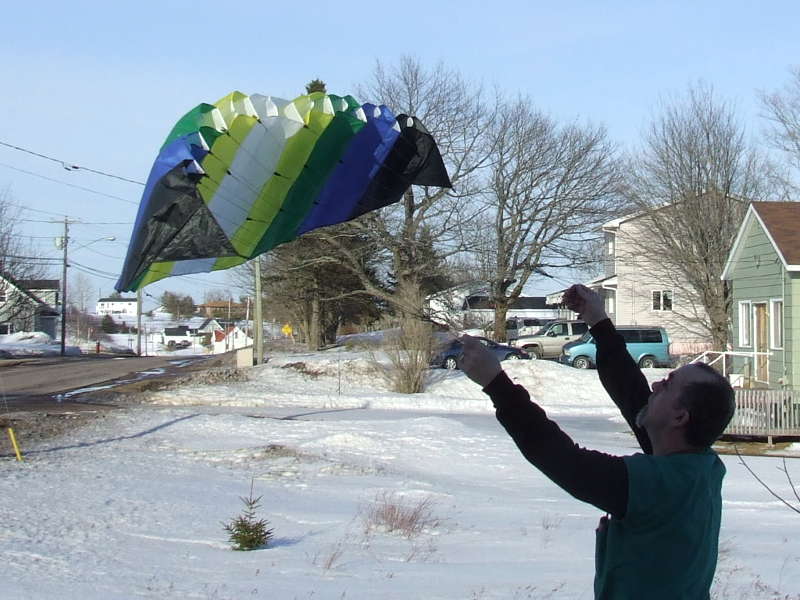
 Sceptre Mk 2
This is the 1.8 m wingspan version, from David Holt's design archived on the Kite Plan Base. The sail area is about 0.9 square meters (approx 9.7 square feet). The design is intended to be simpler to build than most power kites, by using more straight lines and making the seven profiles in the middle identical. The KPB also has the plans for a 2.7 m version.
You can find further discussion on this design here at the kitebuilder.com forums.
It was fairly simple to cut out and sew. With the end cells being so small though, I diverged from the instructions and made it in two halves, then sewed the middle together using the burrito roll method, which keeps all of the seam allowances on the inside. Ultimately, I hope to include the construction photos here.
Click on a thumbnail image for a larger version in a new window:
March 14, 2009.
This photo was taken the same day as the first real flight. Later I moved to the frozen lake just down the road, and hooked up the two flying lines, 100 lb. test braided Dacron.
It was doing pretty well until the left flying line snapped. I think it was a badly done overhand knot behind the figure-eight knot on the bridle collection loop, which caused the line to cut itself.
There weren't any more pictures (because I generally needed both hands to fly it), until July 11, 2009, when I tried it out at Fort Beausejour (near Aulac, New Brunswick). The wind was fairly steady, out of the South, at 17-19 km/h. A beautiful flying day, so I let the lawn grow yet a bit more in spite of it being long overdue for mowing.
I had adjusted the length of the flying lines (80 ' 6") by measuring them in a long corridor while keeping both of them off the floor, and making sure that the sag was equal in each. Previously, one was nearly a foot longer than the other. This got them balanced close enough that it would pretty much fly itself, unattended, with the handle straps hooked over a single stake. It would occasionally drift over to the left or right of the window, and sometimes touch down, but it didn't seem to favour one side over the other. At any rate, that meant I could get much closer to it, and get photos from different angles.
I had also played with the bridle lengths a bit a couple of months ago , but I forget now which ones I had shortened or lengthened. The wingtips still have a tendency to collapse on whichever side you pull, if you try to turn it too quickly. I'll have to reset them all to the recommended lengths again, and see how it goes.
 Taken from off to the left.
The leading edge looks pretty straight, and you can see that the bridle lines join up well forward of the leading edge. I think that the camera was pretty much level for this one, so you can get a good idea of the angle of the flying lines if you were to keep it parked in the middle of the "window".
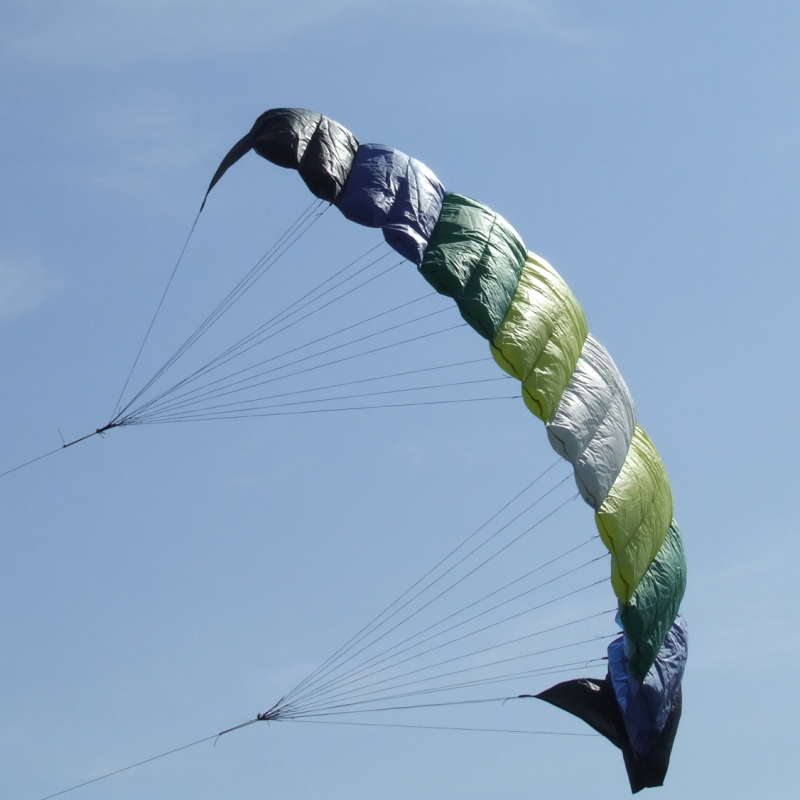 From behind and below.
You can see the arch it forms, and how the pairs of cells (of same colours) appear to be smooth near the leading edge, but form separate tubes towards the trailing edge. I'm not sure why that is so, since the profile pieces all go all the way back to the trailing edge. Maybe the bridle lines force the front to open wider than the rear, which has no bridle lines.
 From straight on, walking up to it between the lines.
Here you can see the left wingtip collapsing a bit, but nearly all of the cells are well-inflated.