|
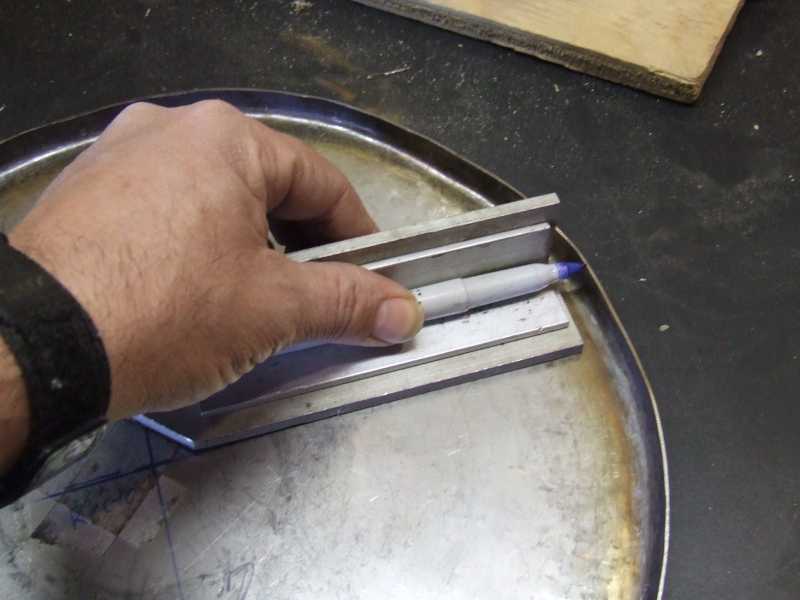
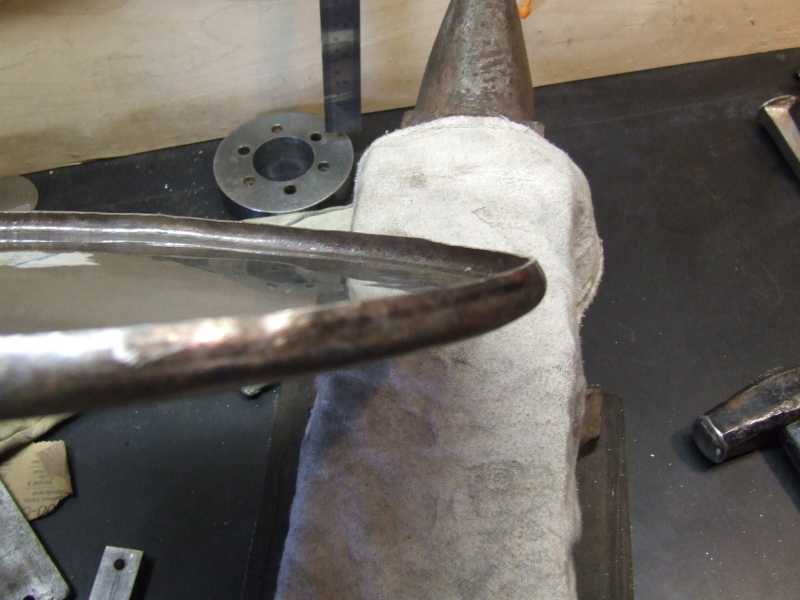
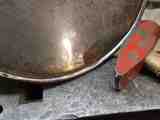
Here I'm drawing around the inside of the rim with a fine-point Sharpie marker. The idea is to keep the tip some arbitrary height from the (supposedly) flat bottom as you move it around. The scraps of aluminum were selected because together they happened to provide a suitable height, and were narrow enough such that they would follow the larger dips and bumps as you slide it around on the warped bottom of the piece.
|
|
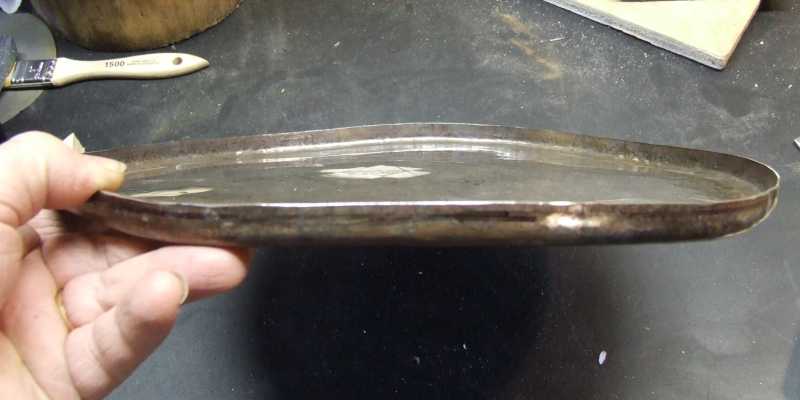
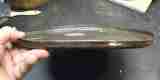
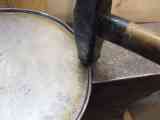
This is how far up I was able to raise the edge. Note the potato-chip bend in the piece.
|

|
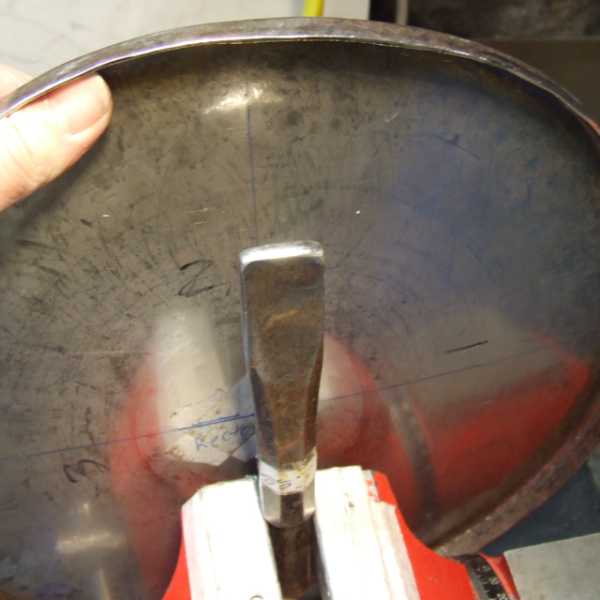
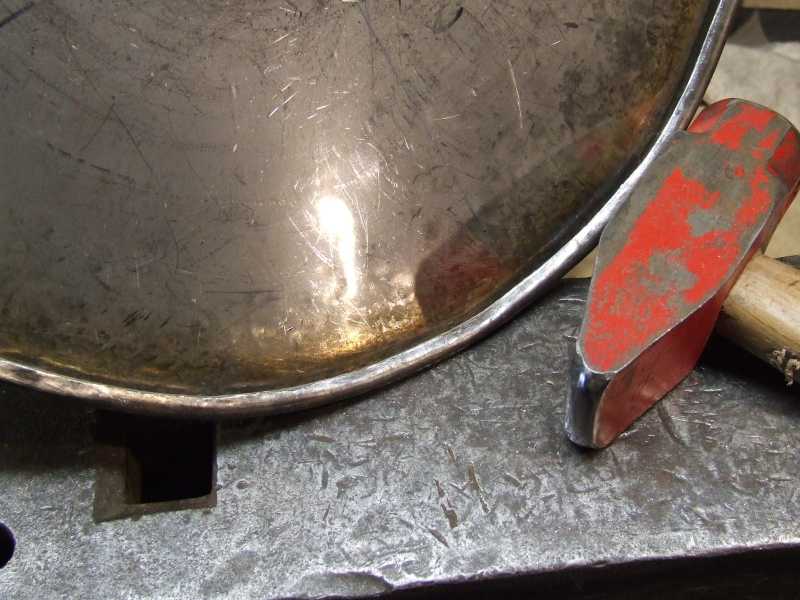
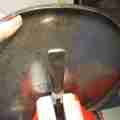
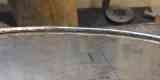
Now the reason for the marking becomes evident. This is looking straight down from the top. I ground the top of the rim down to the mark, so that the height would be the same all the way around. In theory, if I was careful in raising the edge, it should already have been level all the way around, but that didn't happen. I had to work quickly here, because the heat of the grinding made the Sharpie marker line fade within an inch of wherever the wheel made contact. Afterwards I ground and filed off the burr on the outside.
|
|
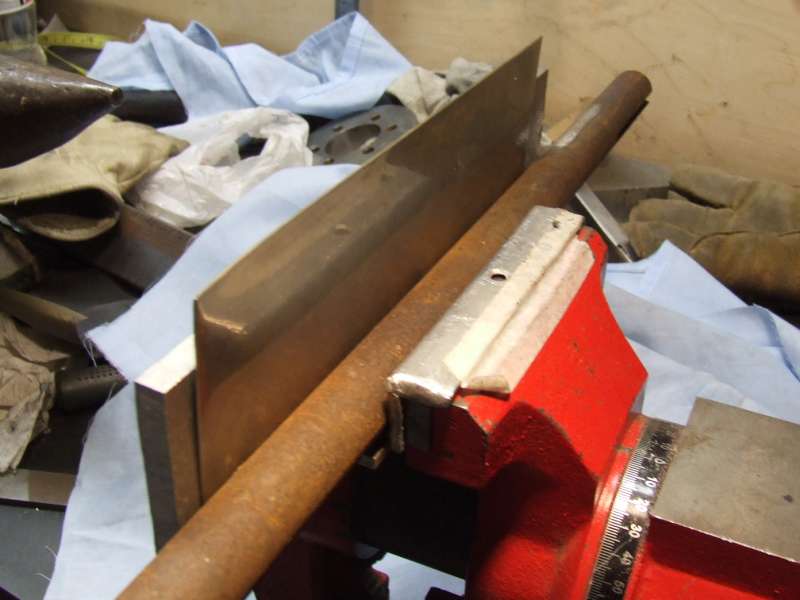
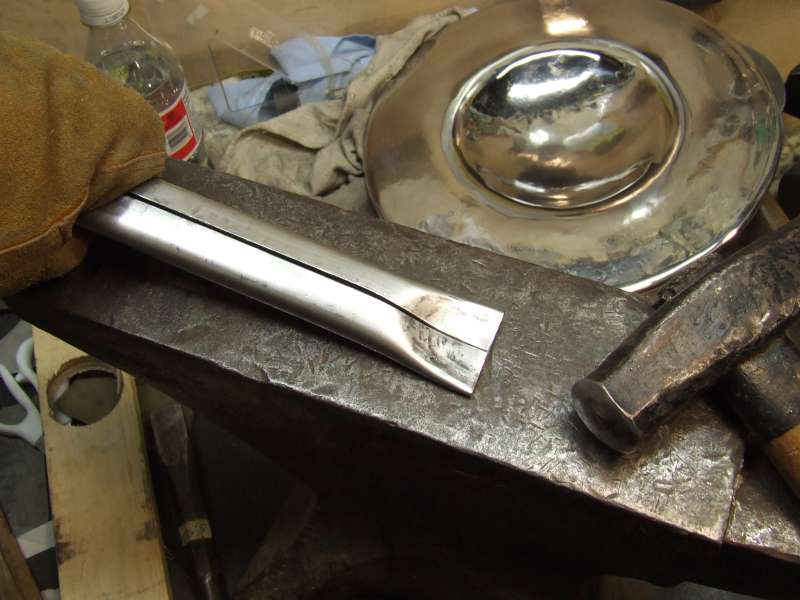
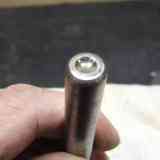
Here's the blunted chisel upside-down in the vise. Two bucks at a flea market and a bit of time at the grinder, filing, and polishing to turn it into a stake. It already had this handy shoulder opposite the business end, which prevents it from slipping down in the vise jaws.
|
|
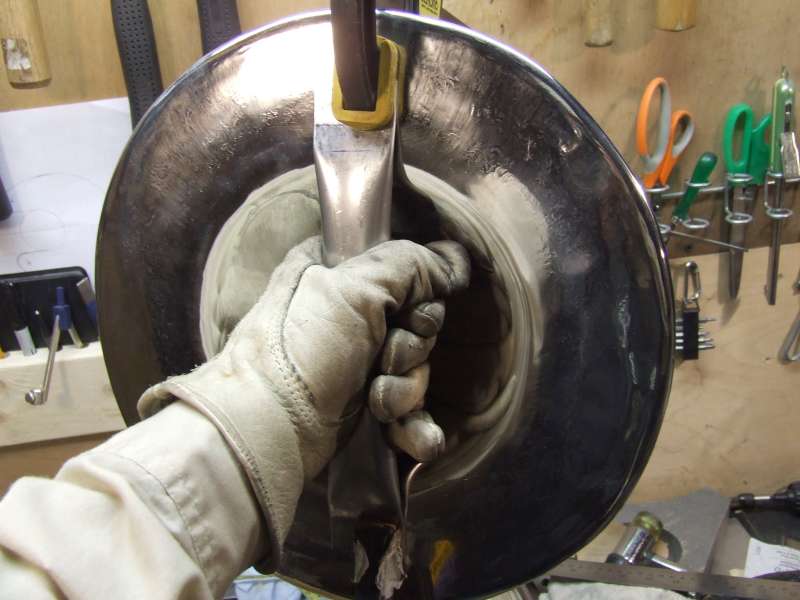
So now I can start pursuading the rim to start curling inward, with many passes using my multi-purpose black hammer (not shown in this photo). I call it that because I'm not sure what it was originally made for. I saw it at the same flea market, and just liked the shape of the head and the handle.
|
|
More curling, using the black hammer again. I'm not left-handed, but I had to pose it that way because the camera is right-handed.
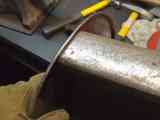
I'm thinking this is where the back side of the piece took a lot of scratches and dents, transferred from my anvil's top.
|

|
Yay! Now we're getting somewhere.
The rag over the anvil was there merely to provide a contrasting background.
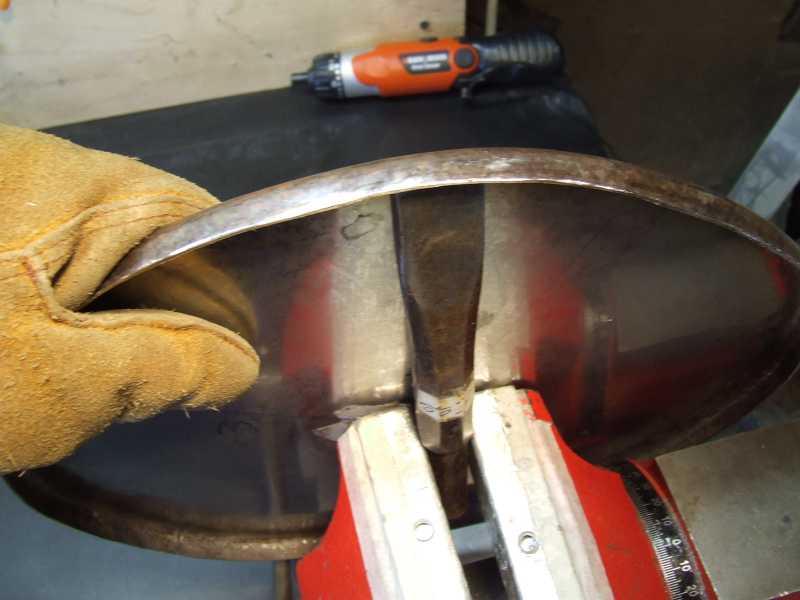
After a few more passes with the black hammer, the edge ended up forming a 180° "J" turn.
|
|
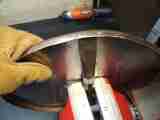
Closing the edge roll with the wedge-end of the cross-peen hammer, to nearly a 270° turn.
|
|
Again with the black hammer. The edge has by this time been curled to 270°, and now I'm closing the gap between the edge and the flat face.
|
|
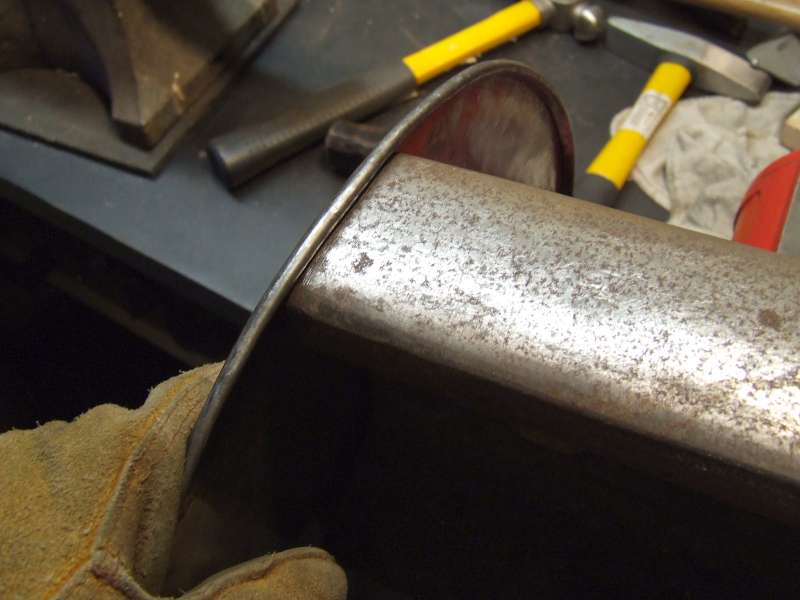
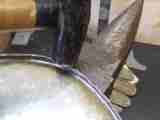
Closeup of the inside of the rolled edge. The grinding that I did earlier helped to keep any gap even, otherwise you can get arches and such that would not close without severely deforming the roll itself.
Compare that with this raggedy-looking edge roll on my first buckler. (That one was, by the way, my first armour-type project of any sort. I ended up placing the roll on the back side, so that my opponents would not see what a sloppy job it was.)
|
|
My idea here was to even out any wobble to the inside of the edge roll, and generally get the outside of the roll to be a bit rounder. The piece of (railroad) rail had been sawed off somewhat squarely, so I was able to bring the flat face of the buckler right up against the end of the rail, and the curve of the top of the rail was more-or-less the same radius as that of the buckler.
I think I was just tapping the top gently, with the flat face of a 16 oz. ball peen hammer. I didn't want to squish it down too far.
|
Guess what?
| Get A Grip
|
|
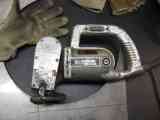
I got a photo of the shears I was able to borrow. My electric jigsaw would have taken forever to cut this stuff. It requires a lot of care and bright task lighting to steer this thing, because once it starts cutting it wants to take off like it's cutting through butter, so it's real easy to wander off the marked line, like a drag racer doing a wheelie.
This is an old Stanley Unishear, model No. U216. One of it's other drawbacks (compared to a jigsaw) is that it tends to curl the thinner side of the cut. On the plus side, the resulting cut edge tends to be fairly smooth, requiring little filing.
|

|
So, now I've got a rectangle, 9.5" by 3.125" (241 mm x 79 mm).
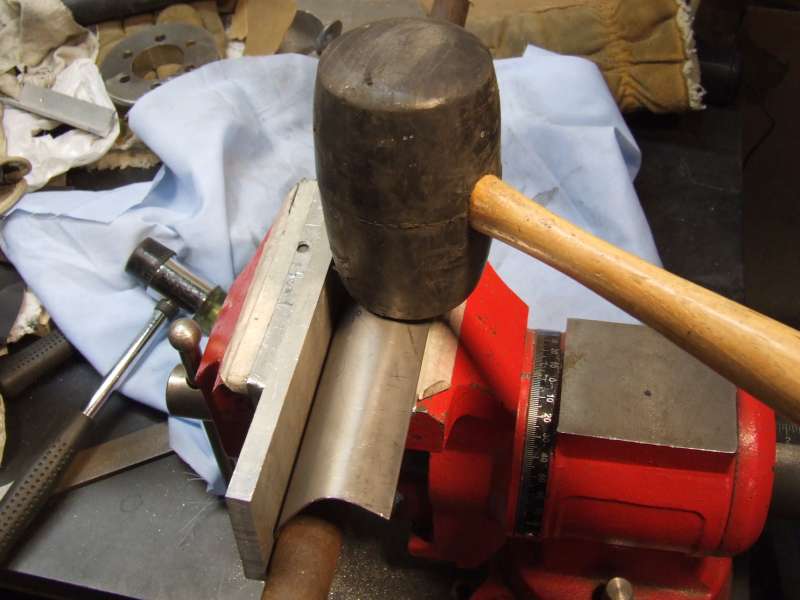
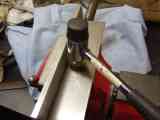
This setup involves a short length of angle iron (with one side horizontal at bottom); a longer, thicker bar of aluminum (essentially just to extend the length of the angle piece, which was the longest piece I could find laying around); the stainless plate, and a length of steel axle from some industrial ventilation unit (about 1"e; diameter); all sandwiched in the jaws of the vise. The bottom edge of the plate is parallel and level with the round bar. Only one jaw is in contact with the angle iron.
|
|
With a combination of just bending it over with my hands and light thumps with the plastic-faced hammer, it curls over the steel rod.
I want to keep it flat along the outer edge for now.
|

|
Flip the piece over, long edge for long edge, and thump it some more...
|

|
... until you get a slightly square-ish "U" channel.
|
|
Now gently pinch it, edge to opposite corner, a bit at a time.
Flip it 90° occasionally, to keep the bending more-or-less equal between one side and the other.
Continue until the two edges start to lean in towards each other a bit.
|


|
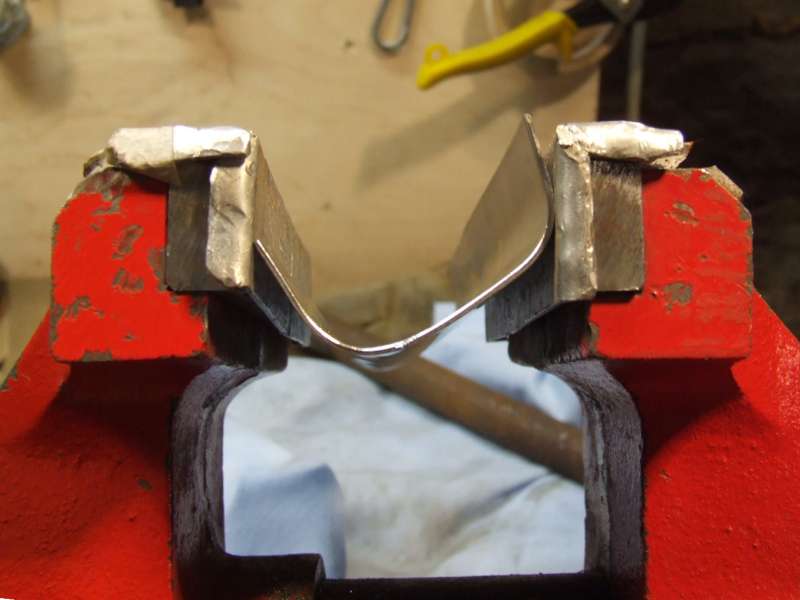
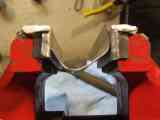
Now you start closing the gap between the edges and simultaneously form it into an oval cross-section.
Go back and forth between hitting the two bends vertically (upper photo) to bring the edges together, and the centre vertically with the edges down (lower photo), so as to flatten it slightly with each pass.
If your anvil's top plate is smooth, I believe the edges should also skid a bit in the flattening stage, bringing them together even more.
Eventually, the two edges should meet in the middle, flush with each other, and (depending on how straight you filed the edges beforehand) with a minimal gap. Any scratches should occur only on the two edges on either side of the gap, provided you used a soft-faced hammer of some sort.
That gap is going to end up facing the umbo, so nobody will see it. Even so, you still must file it for smoothness (while it was still flat), because you really don't want to get a bit of glove or skin pinched between two sharp edges.
|

|
Start flattening the ends.
|
|
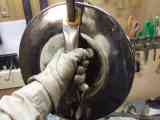
Looks pretty close, let try a fitting.
I clamped the handle into position with some rubber-jawed rachet clamps (one forward, one backwards, for balance), and tried waving it around while wearing a glove approximately the same thickness as my Rapier gloves. Just the right amount of room for my knuckles between the handle and the inside of the umbo.
A few hits later, the flattened ends follow the curve of the edges of the umbo fairly closely. No twist, and riveting should bring them into close contact.
|
|
Here's the gimmick.
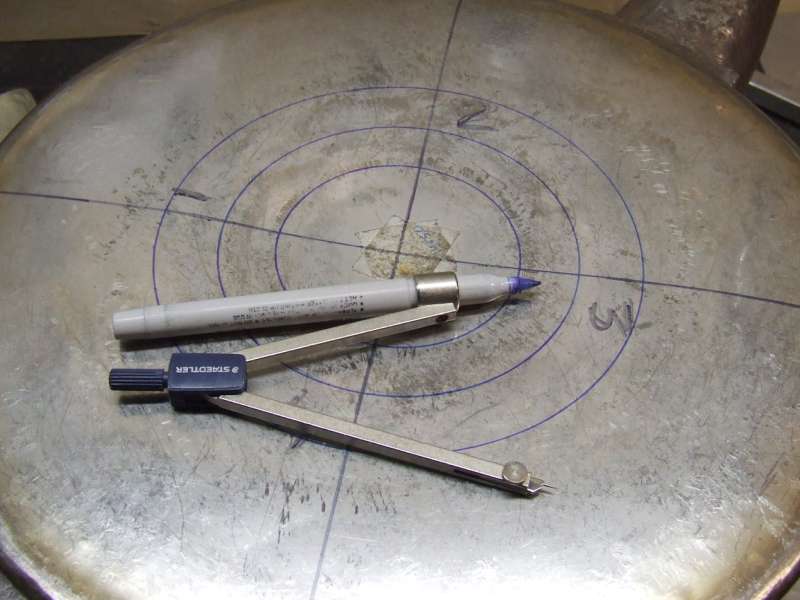
A mark at both ends to indicate the centre line. Also a second mark on both ends, offset by 0.25" from the centre. A piece of masking tape in the middle (so the compass point wouldn't slip around). The cross mark on the duct tape is in the middle lengthwise, but offset by the same 0.25".
|

|
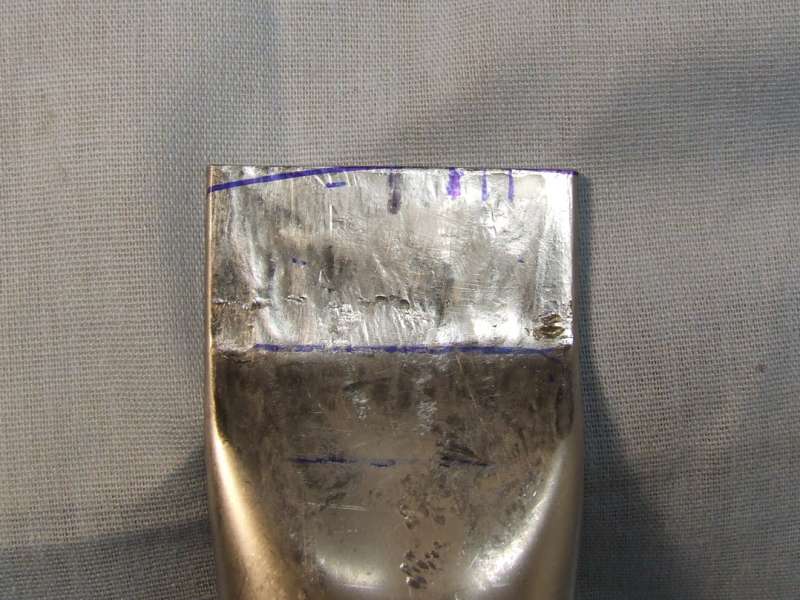
With the compass centred on the cross on the tape, draw an arc on either end. Note that it is assymetrical, and slopes down more on the left.
If this handle was held vertically in the right hand, this photo would be of the top end, to be riveted a quarter inch to the left of centre of the buckler as a whole.
Trim to the blue line, with the grinder and file.
|

|
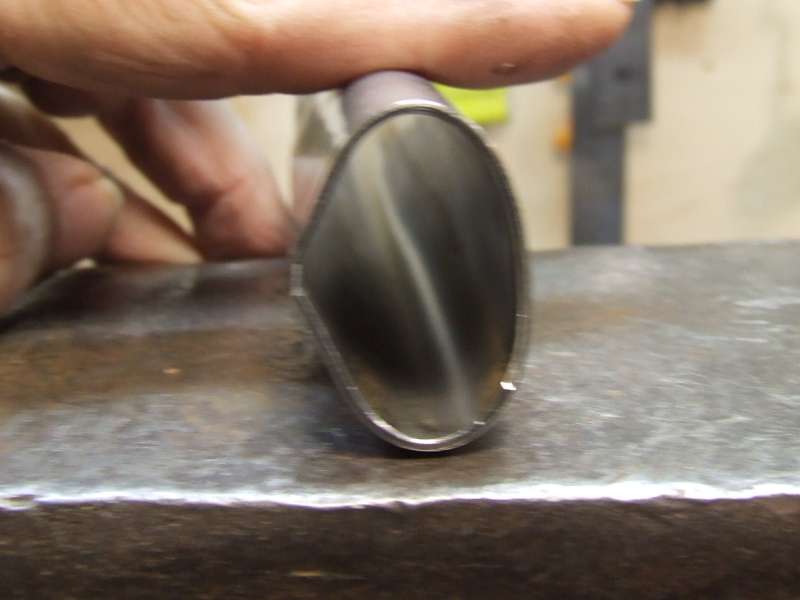
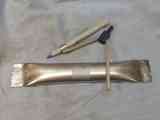
After shaping, sanding, and polishing, the inside of the handle looks like this.
|
|
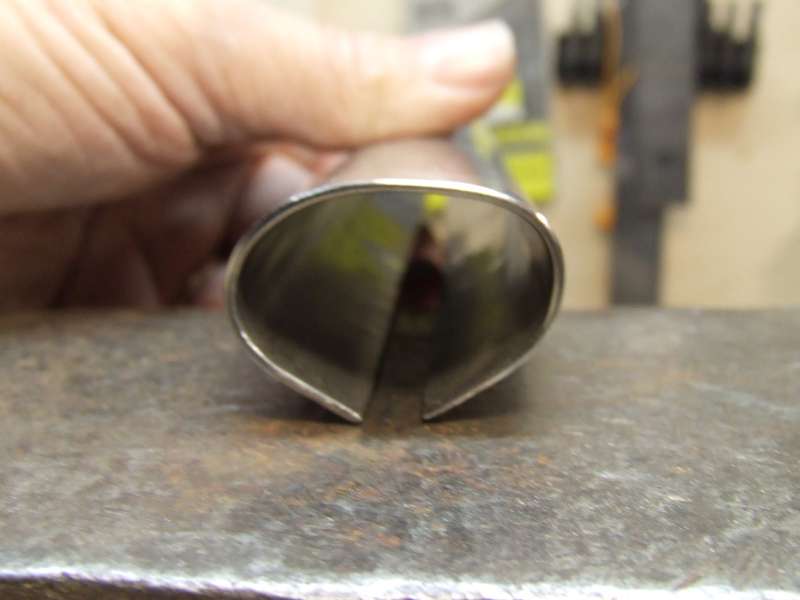
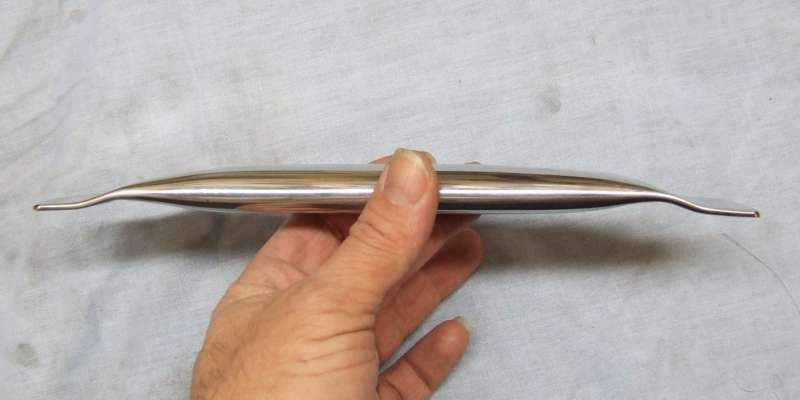
A profile view, showing the slight "S" curve on the ends. The end tabs are pretty much flush with the inside of the gripping part of the handle, and that gives me a bit more room for my knuckles. Next time, I might dish the umbo a bit deeper and leave off the "S" bends on the ends. That would bring the centre of gravity a wee bit further back.
|
|
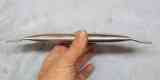
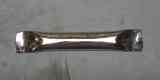
And the outside.
M-m-m-m... shiny.
|
| A Riveting Performance
|

|
Prior to punching the holes for the rivets, I drew arcs on either end of the handle, using an off-centre pivot point for the compass, similar to what I did earlier. The arcs were to indicate how far from the tips I wanted to place the rivets.
I just picked an arbitrary measured distance from the sides, and marked cross-hairs for the four places to punch.
I had to bring it to my workplace, where I had the use of a large (24"' handles) Roper-Whitney punch. My small hand punch at home (a copy of a Roper-Whitney Junior) was barely able to punch through one layer of this steel, let alone the two layers in the handle, nor could not reach in far enough from the rolled edge.
Since I'm a belt-and-suspenders kinda' guy, I had to plan this out fairly carefully. If any one of the holes was out of alignment (between the handle and the buckler) by a fraction of a millimeter, it would be difficult to get the rivet in at all. Since I was using a 1/8"e; diameter brass rod to fashion my own rivets, I did not want to be whittling and filing them any thinner, nor enlarging the holes. I did not want to depend on the accuracy of tracing through holes with a marker.
So, here's the procedure I came up with:
- Mark, dimple (with a center punch), and punch all four holes on the handle tabs.
- Put two pieces of tape on the front of the buckler, in the area where you'll be punching holes. This is to protect the front surface from being scratched by the bottom part of the punch die.
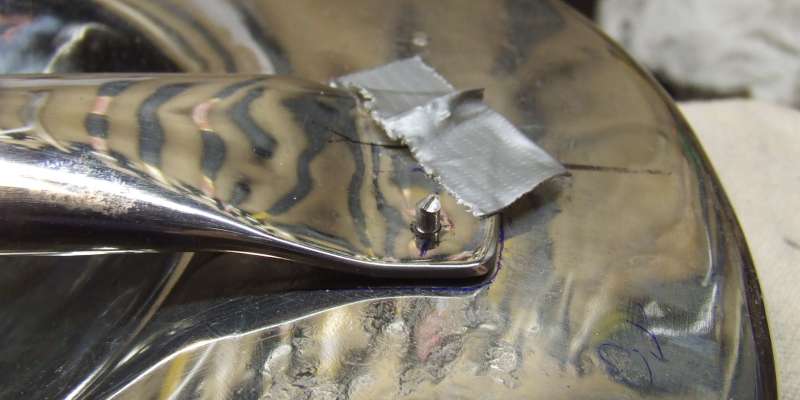
- Position the handle on the back of the buckler, keeping in mind the 1/4"e; offset, and mark a small circle with the fine-point Sharpie marker by tracing inside just one of the holes in one end of the handle. Dimple the middle of the marked circle.
- Punch the one hole marked on the buckler, with the Roper Whitney punch.
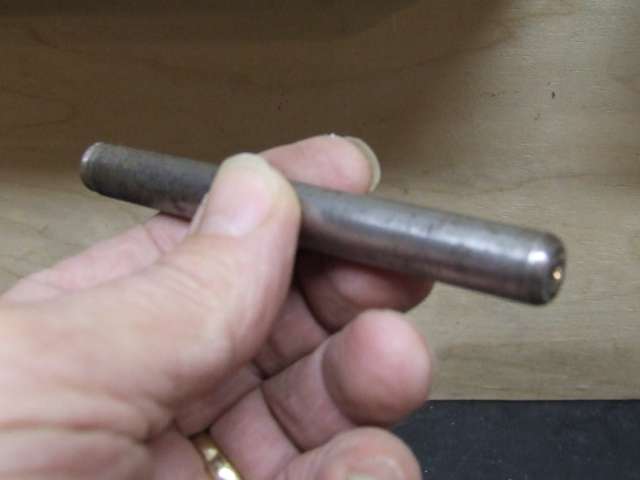
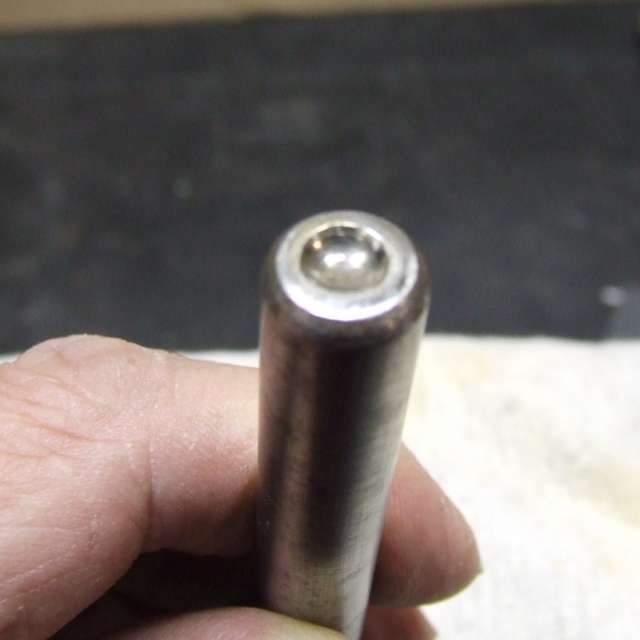
- Insert a temporary rivet-like pin (I happened to have some short pieces of 1/8"e; diameter aluminum welding rod) through the buckler hole and the corresponding hole in the handle.
- Stick a bit of tape on either side to keep the aluminum pin from falling out. Also tape the other end of the handle (avoid covering the punched holes) to keep it aligned on the buckler.
- Punch a hole on the opposite end and opposite side of the handle, with the punch passing down through the pre-punched hole in the handle and through the buckler.
- Insert and tape a temporary pin in this new hole, as in step 5 above. There should now be no chance for mis-alignment.
- Punch the remaining two holes, also through the pre-punched handle holes.
|
|
I don't have any photos of the riveting process. (You can read up on that on some of the links at the top of this page.)
I simply cut four 3/8" (9 mm) lengths of 1/8" diameter brass rod with a bolt cutter, and replaced the temporary aluminum pins with them. I did not prepare them with a head beforehand, I just kept flipping the piece over and peening both ends of the rivets at the same time.
As far as determining the cut length of the rivets went, I just pushed the rod through the pieces and added 1/8" on each end, using the rule of thumb of having the shank stick out the same distance as the diameter of the shank
.
I used a soft-jawed clamp to squeeze the two sides together until I had expanded the shank (by hammering) enough to keep them locked together.
|
|
These two photos are of a quick-and-dirty "rivet set" tool I fashioned out of a scrap of steel bar. I made it by sticking the bar in the chuck of a lathe and a large drill bit on the spindle side. The tip of the drill bit had a fairly wide flat part (sorry, I don't know drill bit terminology), such that the shallow hole I made in the bar had a flat bottom and sloping sides. The flat bottom was about half as wide as the outer end of the hole. I started peening each rivet with a very small ball peen hammer, only about 4 ounces or so, but later switched to a 16 oz ball peen.
Once I got the shank expanded and the two ends mushroomed out, I used the rivet set to make the heads nice and round (well, rounder). I'd support the bottom of the rivet with a scrap block of aluminum, which is relatively soft and doesn't mark up the head as much.
When the rivet set was new, the heads tended to end up like flat-topped cones, but with use (since I didn't temper it or anything) the hole is becoming more hemispherical, resulting in dome-like rivet heads.
One of its other benefits is that it's easier to finish forming the heads, with less risk of missing the rivet and denting the sheet metal.
|

|
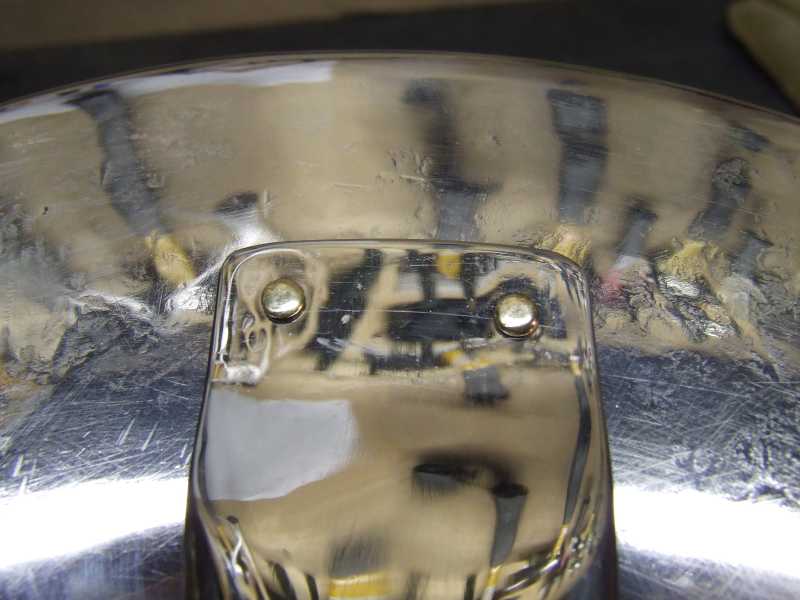
The finished rivets. You can't easily tell they're brass, because of the fluorescent lighting I suppose.
The camera's macro function really shows up the scratches and dents though, from before the riveting.
|
|
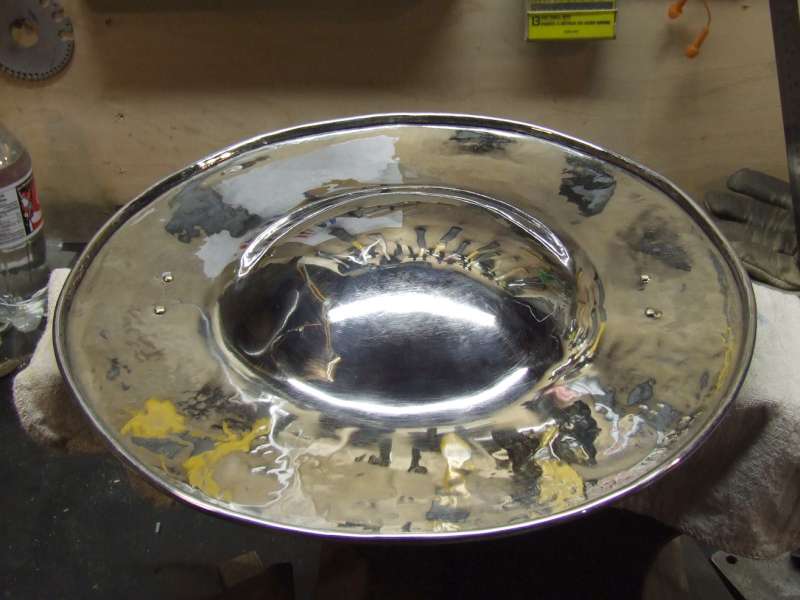
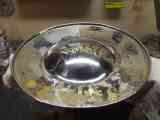
The finished buckler, front.
|
|
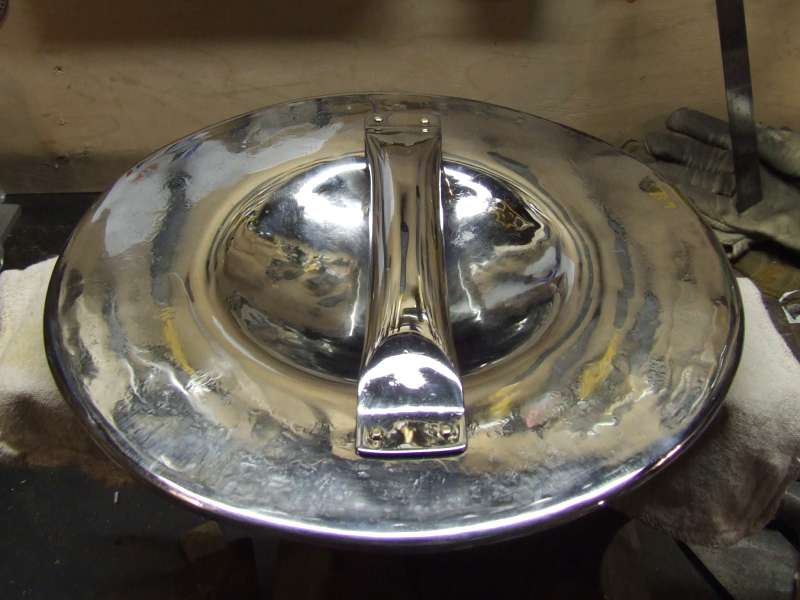
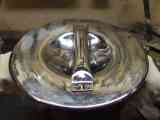
The finished buckler, back.
|
Something that is conspicuously absent from this buckler is the belt clip. I figure that if it turns out that I miss it, I can always add one.
The grip feels just a leetle bit too wide now, so next time I might make it about a 1/4" narrower.
Now I must go try it out at the next practice, and watch it get all scratched up. At least it ain't gonna rust on me!
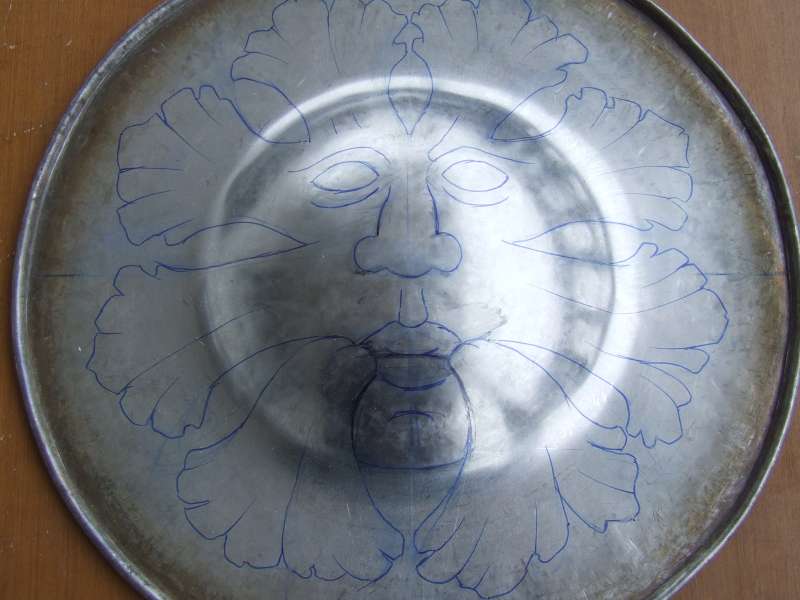
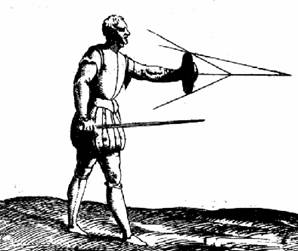
 Originally, this was to be called "The Greenman Buckler", being a buckler for Rapier Combat
made out of 19 gauge stainless steel, and embossed with a pattern inspired by one of the the Green Men of Canterbury Cathedral. The notion of putting a face, of any kind, on a buckler came from the (woodcut?) illustration reproduced at the bottom of page three of this ARMA article, The Sword & Buckler Tradition.
Please do not take this page as a tutorial on the way to make a steel buckler. If I had to make a living at this I'd be making pennies per hour. This is more like a journal of my trials and tribulations. A lot of this stuff I just made up as I went along. There other tutorials out there by far more competant armourers. Here are a few:
Originally, this was to be called "The Greenman Buckler", being a buckler for Rapier Combat
made out of 19 gauge stainless steel, and embossed with a pattern inspired by one of the the Green Men of Canterbury Cathedral. The notion of putting a face, of any kind, on a buckler came from the (woodcut?) illustration reproduced at the bottom of page three of this ARMA article, The Sword & Buckler Tradition.
Please do not take this page as a tutorial on the way to make a steel buckler. If I had to make a living at this I'd be making pennies per hour. This is more like a journal of my trials and tribulations. A lot of this stuff I just made up as I went along. There other tutorials out there by far more competant armourers. Here are a few: